


Are you tired of entering your password every time you log in? Do you want to disable the login password on your Windows 10? This guide will help you. It is simple and easy to do. Follow these steps to disable the login password on Windows 10.
Logging in with a password can be annoying. Especially if you are the only person using your computer. It takes time and can be frustrating. Disabling the password can make your login process faster. But remember, it is less secure.
First, open the Run dialog box. You can do this by pressing the Windows Key + R on your keyboard. This will open a small window.
In the Run dialog box, type netplwiz and press Enter. This will open the User Accounts window.
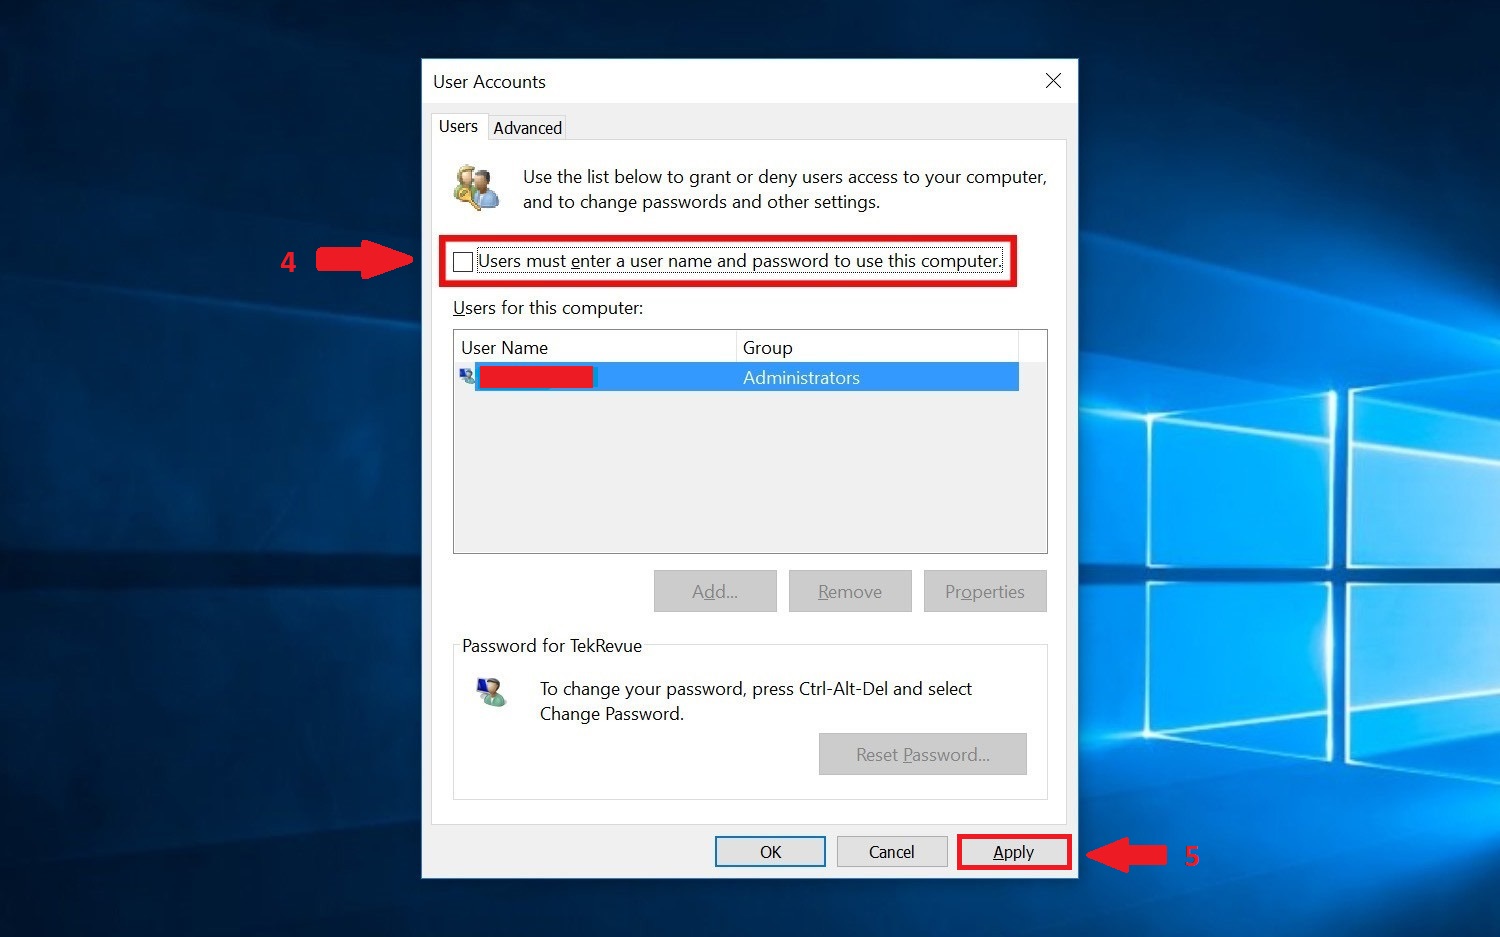
In the User Accounts window, you will see a list of all the users on your computer. Click on your user account. Then, uncheck the box that says Users must enter a user name and password to use this computer.
After unchecking the box, click Apply. A new window will pop up. It will ask you to enter your password. Enter your current password and confirm it. Then click OK.
Restart your computer to apply the changes. When your computer turns back on, you will not need to enter a password to log in.
Disabling the login password can make your computer less secure. Anyone can access your files if they have physical access to your computer. If you decide to disable the password, make sure your computer is in a safe place.
If you want to enable the password again, follow the same steps. But this time, check the box that says Users must enter a user name and password to use this computer. Enter and confirm your password. Then click OK.
If you want a faster way to log in, you can set up a PIN. A PIN is a four-digit number. It is quicker to enter than a password.
Go to Settings > Accounts > Sign-in options. Turn off the password requirement.
Removing the login password can make your PC less secure. Consider the risks before doing so.
No, you need admin rights to change login settings. Log in as an administrator first.
Go to Settings > Accounts > Sign-in options. Disable the password requirement.
Disabling the login password on Windows 10 is easy. It can save you time and make logging in simpler. But remember, it also makes your computer less secure. Follow the steps carefully and make sure your computer is safe.
Thank you for reading. We hope this guide helps you disable the login password on Windows 10. If you have any questions, feel free to ask.